Easy DIY Faux Stone Lamp
I'm sure you've all seen those gorgeous stone lamps, right? They're beautiful, but kinda pricey! I recently learned of a way to get the same look, but at a fraction of the cost! Wanna see? It's so easy!
Okay first you need to find a lamp. I love hunting thrift stores, but maybe you have one lying around the house that needs a little makeover. I found my lamp at Goodwill years ago.

First thing we're going to do is give it a coat of paint to help the joint compound (we will be adding later) stick better. Maybe the joint compound would stick just fine without it, but the paint will also helps to cover any areas the joint compound might not be applied as thick. I plan to keep my lamp white, so I want the base to be white as well.
I had some of this spray primer leftover from another project, so this is what I used. I think it helps if your paint has a primer in it.

I spray painted a quick coat over the lamp. I didn't worry about how even my coverage was, but if I were to do it over again I would have done a better job of trying to make sure it was nicely covered for the reason I stated above. It helps for those areas where the joint compound is applied more thinly and shows through a bit. So just make sure to give it a nice even coat. The picture below looks like it's covered pretty well, but there were some areas in the back where the blue was still peeking though.

After the paint dries, the fun part begins! You get to dig your hands around in some joint compound! Woohoo! I got my joint compound from Home Depot, but you can find it at any Hardware Store. The key is to fine pre mixed joint compound. My bucket cost less than $5.

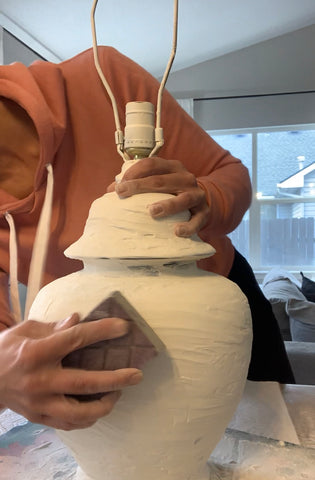
You really can't go wrong with this next part. Just dive in and start smearing the joint compound on until the lamp has good coverage. I didn't have any gloves, so I dove in bare handed. If you have disposable gloves, I'd wear those unless you love cool sliminess squishing between your fingers. It felt kind of gross, but was actually pretty fun! (This washes off well. I tried to wipe as much off my hands onto a paper towel before rinsing it down the drain.)

Once the joint compound is on nice and thick, you can smear it around until you get the look you're going for. Don't overthink this part too much! I smeared mine around in rough horizontal strokes. (See picture below). Once you're satisfied with how it looks, it's time to let it be so it can dry. I gave mine about 24 hours of dry time.

After it is good and dry, you will sand it slightly to smooth it out. I used a sanding block/sponge because it is pretty gentle You can also use a low grit sand paper. This part gets pretty dusty. It is really cold here in North Idaho right now, so I did this inside, but I'd recommend doing this outdoors if possible.
Wipe off any excess dust after sanding. Next I chose to paint over the joint compound with some craft paint I had on hand from Michael's. I think a bottle of this paint was around $1. I used a sponge brush.

Isn't it looking neat? This makes me excited! While I waited for the paint to dry I ran to Ross to look for a lamp shade. I have seen lamp shades there before, so I thought it was a good place to check! I found the perfect oversized white drum lampshade that would compliment my lamp base so well. Walmart and Target would also be great places to check for lamp shades sold separately.
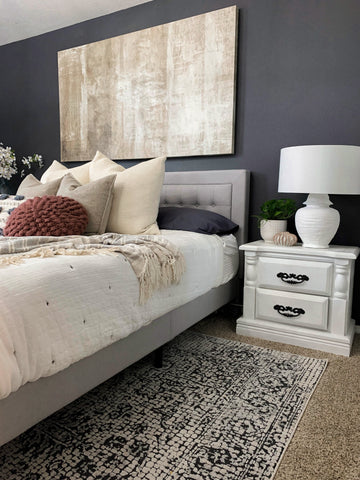
It's complete! Check it out my FAUX stone lamp!

I just love how it turned out! I was able to save a TON of money by making this myself, and it was so easy! Now I'm ready to create a few more DIY Faux Lamps!